>>>THE SIMPLE FARMHOUSE HAS MOVED! HOP OVER TO THE NEW WEBSITE AT:<<<
https://www.thesimplefarmhouse.com/
We found our dining room table – aka “the beast” – at the Pottery Barn Outlet about seven years ago. It’s HUGE! And we love it. They were having a sale, on top of a sale, on top of their already discounted stock, and we managed to score this gorgeous table for pretty cheap. It had a couple of spots that had some finish issues, which is why I think it was so steeply discounted. And even so, the company was super helpful and gave us an additional 50% off when the finish continued to peel away after just a few weeks at home. We ended up paying about $150 for it in the end. And I am a very happy customer. (Thank you Pottery Barn!)
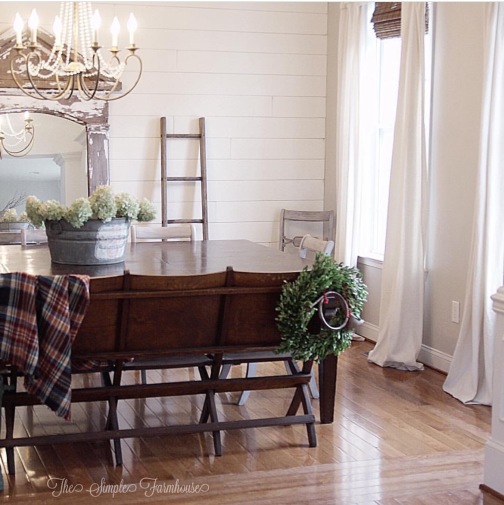
So the bottom line is, we bought it knowing that down the line it would eventually need to be refinished. And we got seven hard working years out of it before I finally caved and came up with a plan to fix it. Here’s what it looked like before… (I’ll show you a close up of the finish issues in a second.)
I briefly toyed with the idea of painting it white (enter the ‘colorphobe’ subtitle), but I knew that in my heart of hearts I wanted it stripped. I wanted it wood. I just didn’t want to do the work. So I came up with the ‘lazy girl’s plan’. I would just strip the top to get my pretty wood tones and then paint the apron and legs. Maybe someday I’ll strip the legs too, but for now, it was actually the perfect opportunity to try out some ….wait for it…COLOR.
Here are the details on how I did this cheap, DIY table makeover, in case you have a ‘beast’ in your home too. Instead of replacing it, save the cash and get a “new to you” version.
DIFFICUTLY: Medium (because of time and energy, not know-how; a beginner could certainly take it on)
TIME: a weekend of coming back and forth to it.
COST: This depends on what you already have on hand. I needed only a few items from the list below and I spent less than $25.
SUPPLIES: stripping gel, scraper or putty knife, wire brush, paint brush, (bleach, if you want to lighten the tone like I did), paint, polycrylic, some disposable metal trays, chemical safe gloves, painters mask, orbital or palm sander and 120 grit paper (that was just what I had on hand – again with the lazy girl plan)
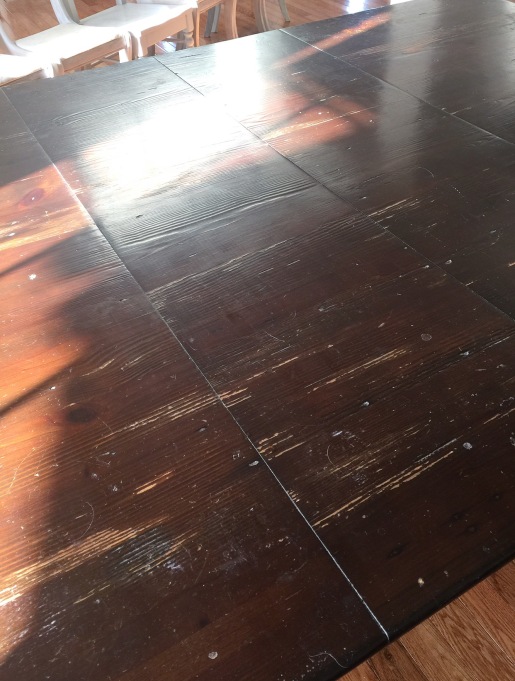
Here’s the ugly truth. Instagram doesn’t clearly show the closeups of a battle worn table top that has lived through 5 toddlers and almost a decade of Thanksgivings, Christmases and meal hosting. You might have looked at that before and think “WHY?” Well, here’s why:
So I bought some stripping gel and got to work. I used Watco, which I believe is a Rustoleum product, so you can find it where ever Rostoleum is sold. I have only used Citristrip before trying this product and I thought it was a lot more effective and easier to use. You just pour the product into a metal pan, apply it generously with a paint brush and let is do its thing for about 15 minutes. Then scrape away…


The wire brush is for getting into those knot holes and deep crevices that the scraper can’t reach. The first process was fairly effective, but it needed another round. So I repeated step 1 and it looked like this…
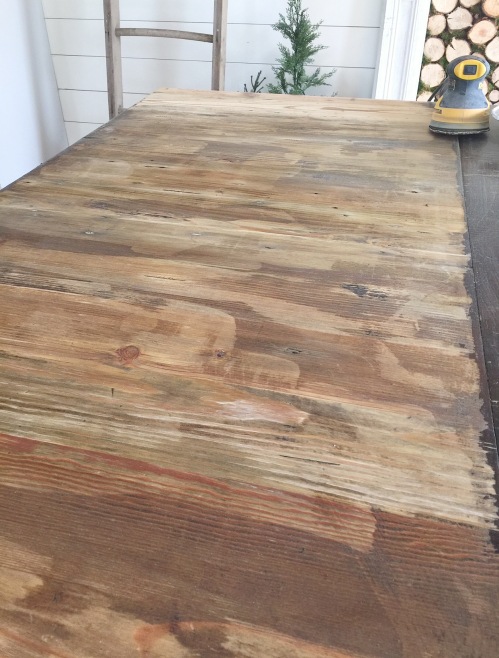
I let the table completely dry and then it was time for the orbital sander. It made quick work of what was left. (Wear your mask!)
Here is a breakdown of what it looked like at each stage:
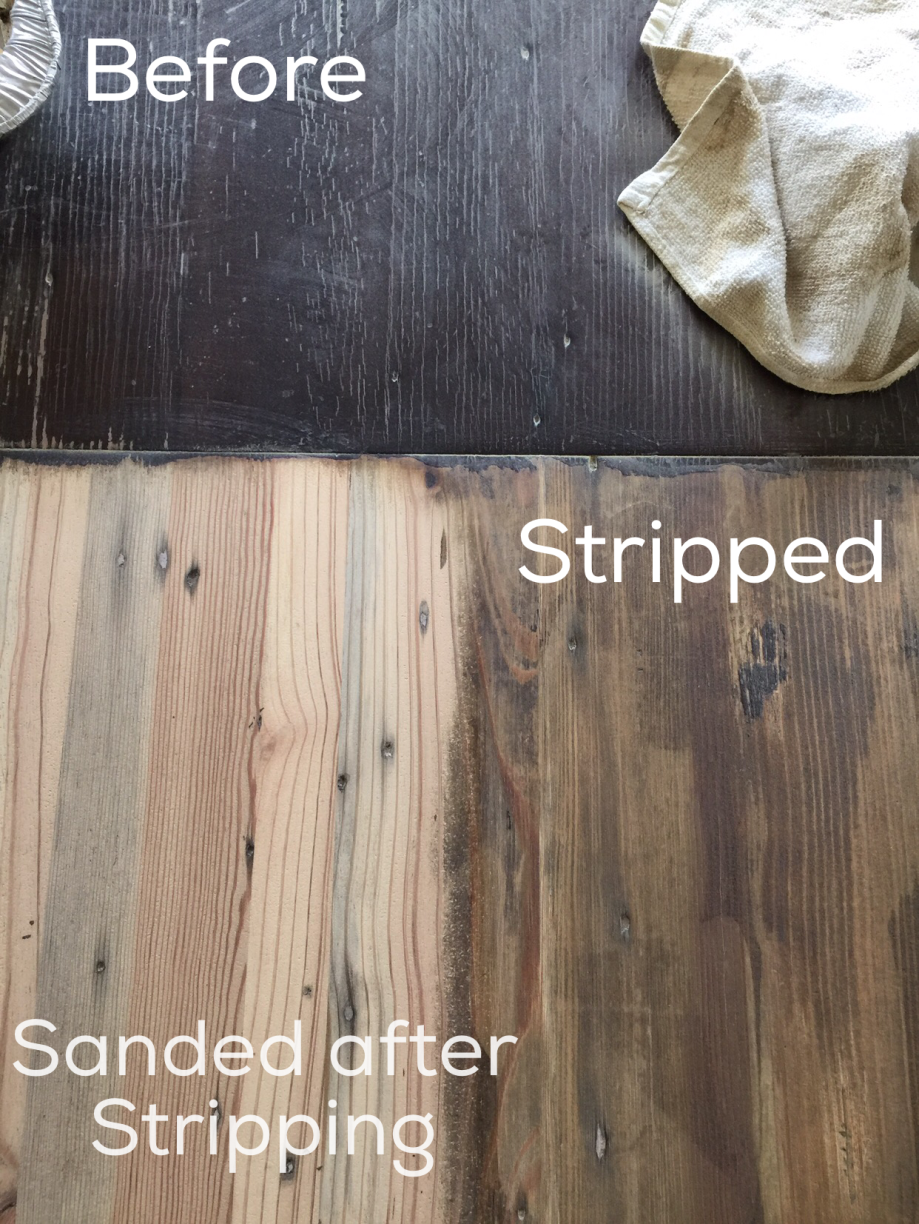
What a difference already! I couldn’t wait to see what the room would look like with this new, brighter wood tone in the mix!
But see all the black marks? Some of these dings and dents were faux aging that was applied to the piece in the factory, but a lot of it was from our kids eating at this table every night and ‘loving’ it for seven years. So I knew I didn’t want to knock all of that ‘love’ away. (I’m sentimental that way.) This was when I decided to bleach what was left. Bleaching is a process that lifts stains from the wood, evens tones and lightens things up a bit. But it won’t overdo the job either. It was just going to give me some color correction and balance.
I used a splashless, linen scented bleach (because the smell just really bothers me). I brushed a small amount on at a time and rubbed the areas that needed toning using a fine steel wool (made for refinishing, you can find it on Amazon or at the hardware store). If you are unsure about this process there are youtube videos to boost your confidence. It’s super easy!
Bleach won’t alter the color of your wood or anything, but it will lighten stain that has been absorbed deep into the fibers of the wood grain. You can see that the end result was a table that still looked loved, but now at a level I could live with.
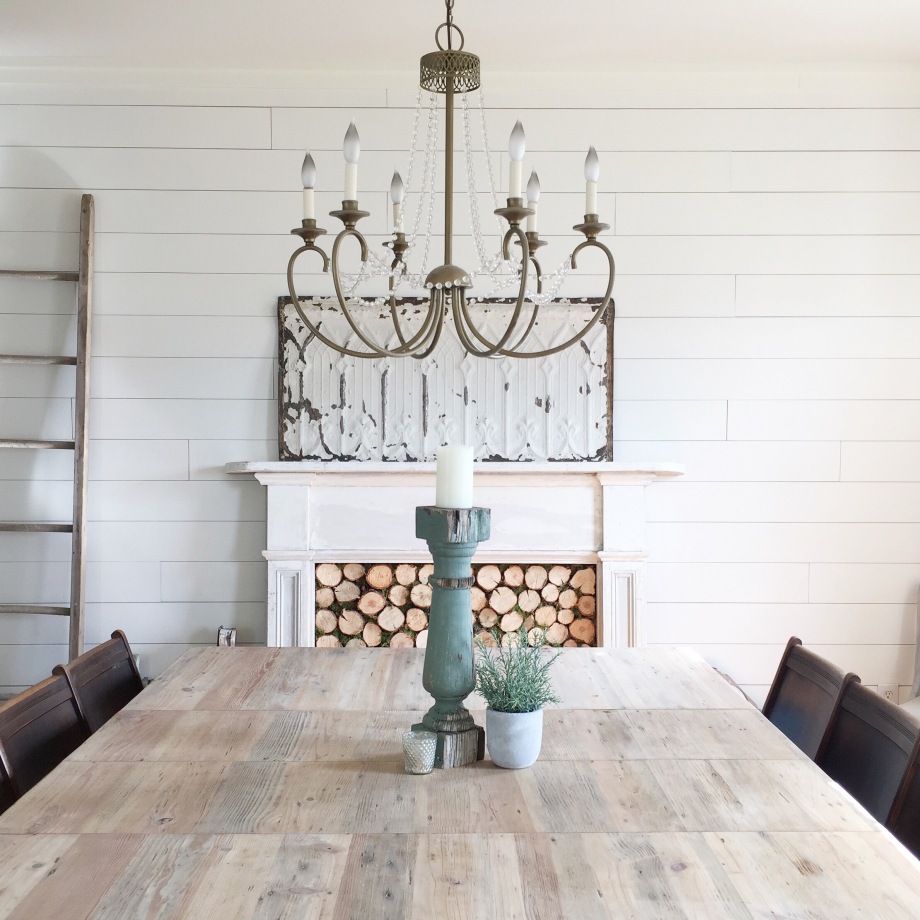
For the apron and legs, I gave it a good wipe down and a very light pass over with the sander, just to give the surface a little tooth for the paint to grip. I love the navy trend going on right now and this navy has some interesting undertones of peacock green. It’s superb! And that’s coming from a colorphobe!

I have some Polycrylic on hand, ready to finish the top with an extra coat for durability. I’m afraid of messing up that beautiful raw wood look, so it’s matte finish. I picked Polycrylic because it’s clear (won’t amber the wood) and it’s a solid option for handling hot plates. It’s touchy – it doesn’t like being overworked – but it gives a nice finish. So my recommendation if you choose this option is to roll it on very thin, with a smooth, 4″ cabinet roller. Work quickly, and only go over each line once. I haven’t done this step yet, and I’m enjoying the raw wood look for just a little longer. I like it too much!
A “new” table for $25. Not bad huh?
Happy refinishing!
xoxo,
Laura
